Your Custom Topper — Designed
Strand by Strand
We don’t adjust stock pieces. Every topper is made from scratch, shaped to
your hair loss pattern, matched to your exact color, and built with the
construction that works best for you. Below is everything
you need
to design your custom piece.
STEP 1 — Choose Your Construction Type
| Construction Type | Description | Best For | Pros | Considerations |
|---|---|---|---|---|
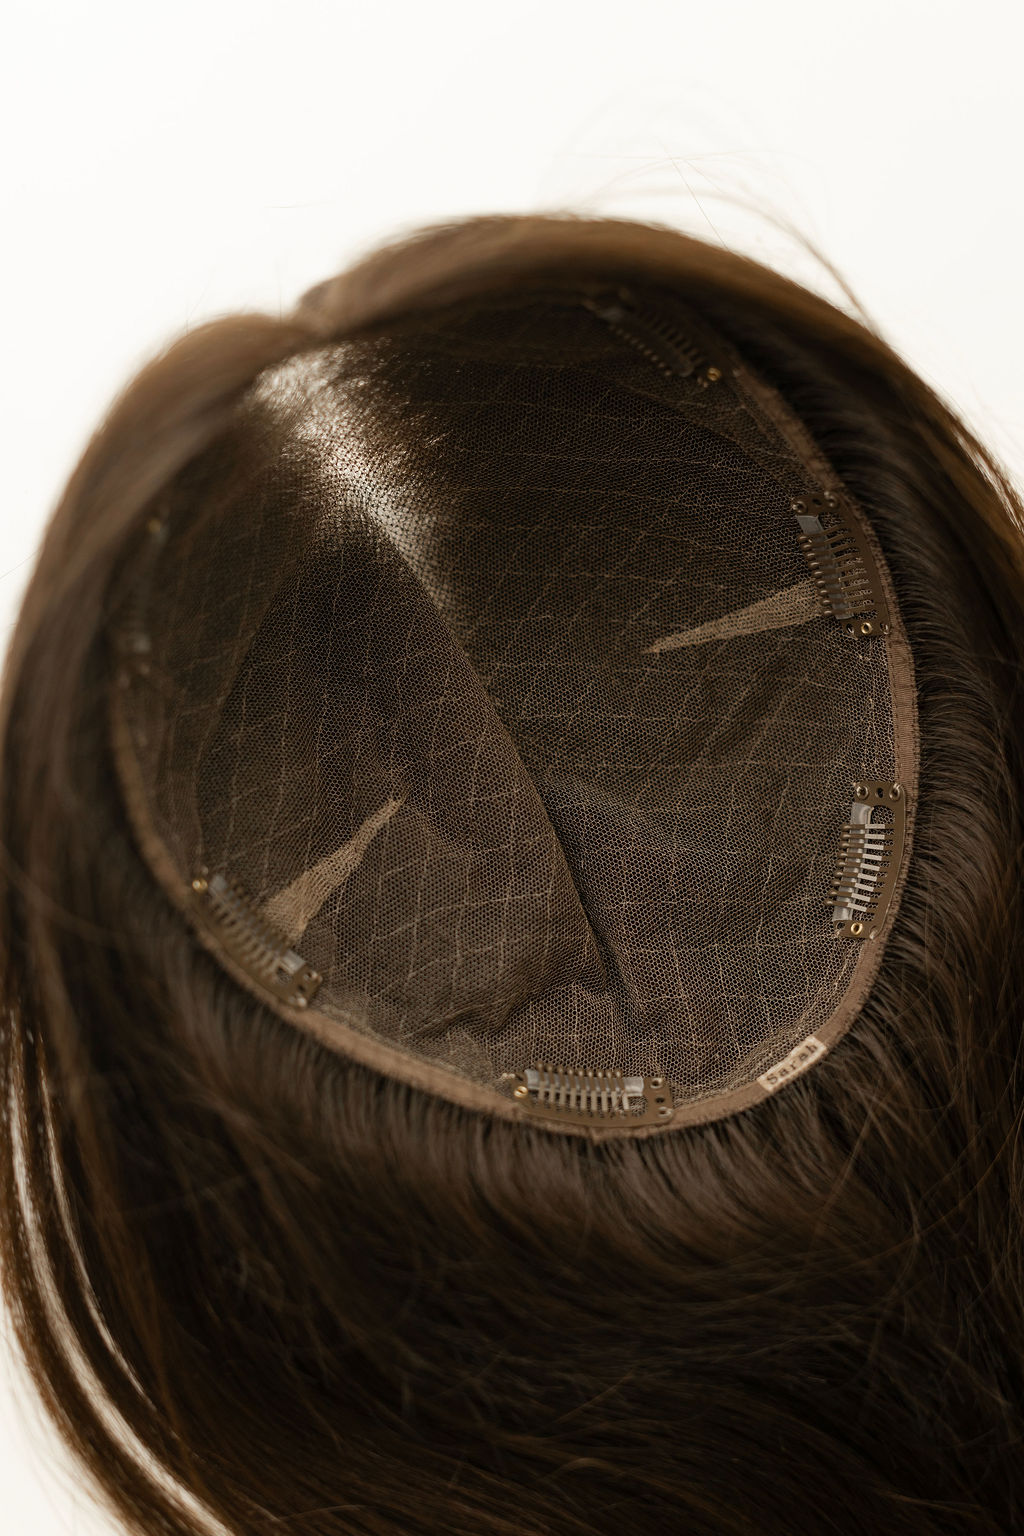
| All Hand-Tied Lace Top | A fully hand-tied lace base that is the lightest and most natural-looking option. | Most breathable; moves naturally; feels nearly weightless. | Extremely natural scalp appearance; softest, weightless feel. | Delicate; requires gentle handling. |
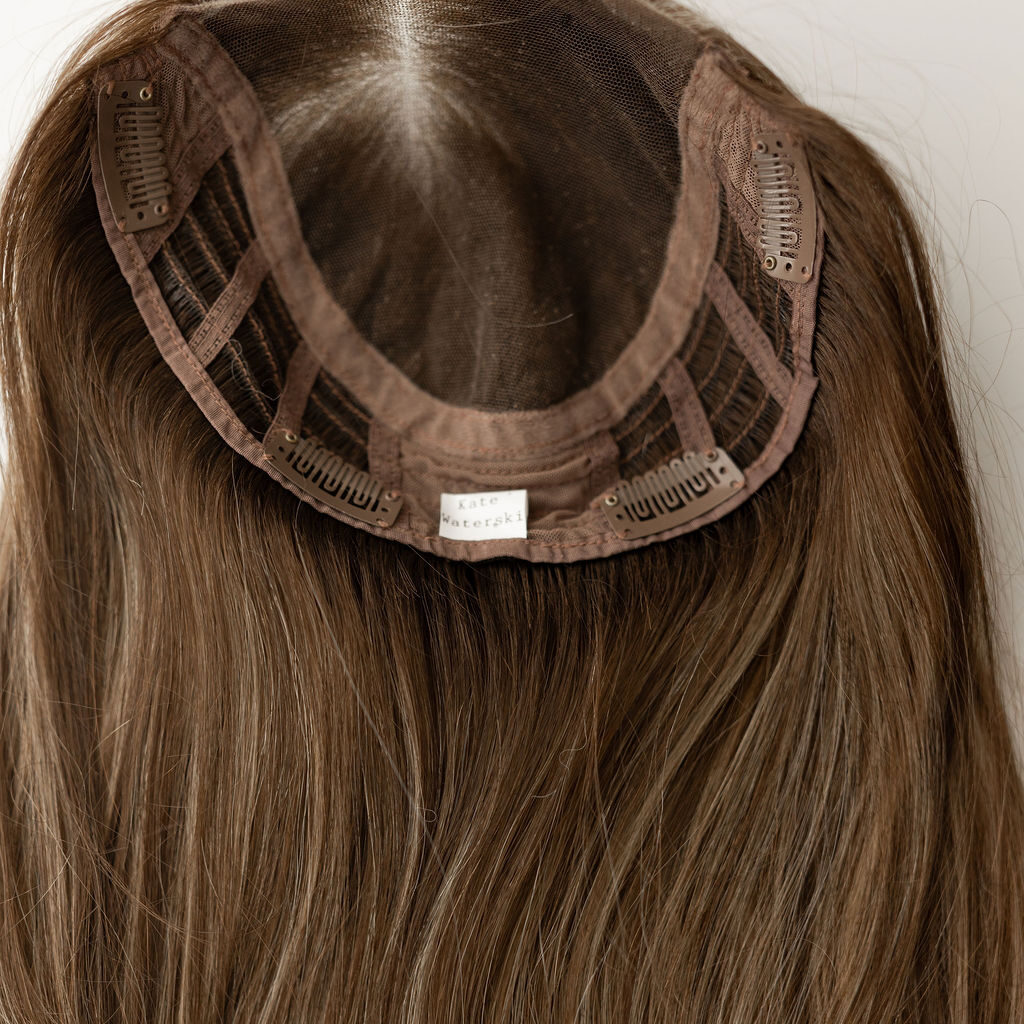
| Lace Top With Wefts | A natural lace top combined with wefts around sides and back for strength. | Daily wearers who want comfort + realism. | Lightweight; natural scalp look; added durability. | Slightly heavier + more structured than full lace. |
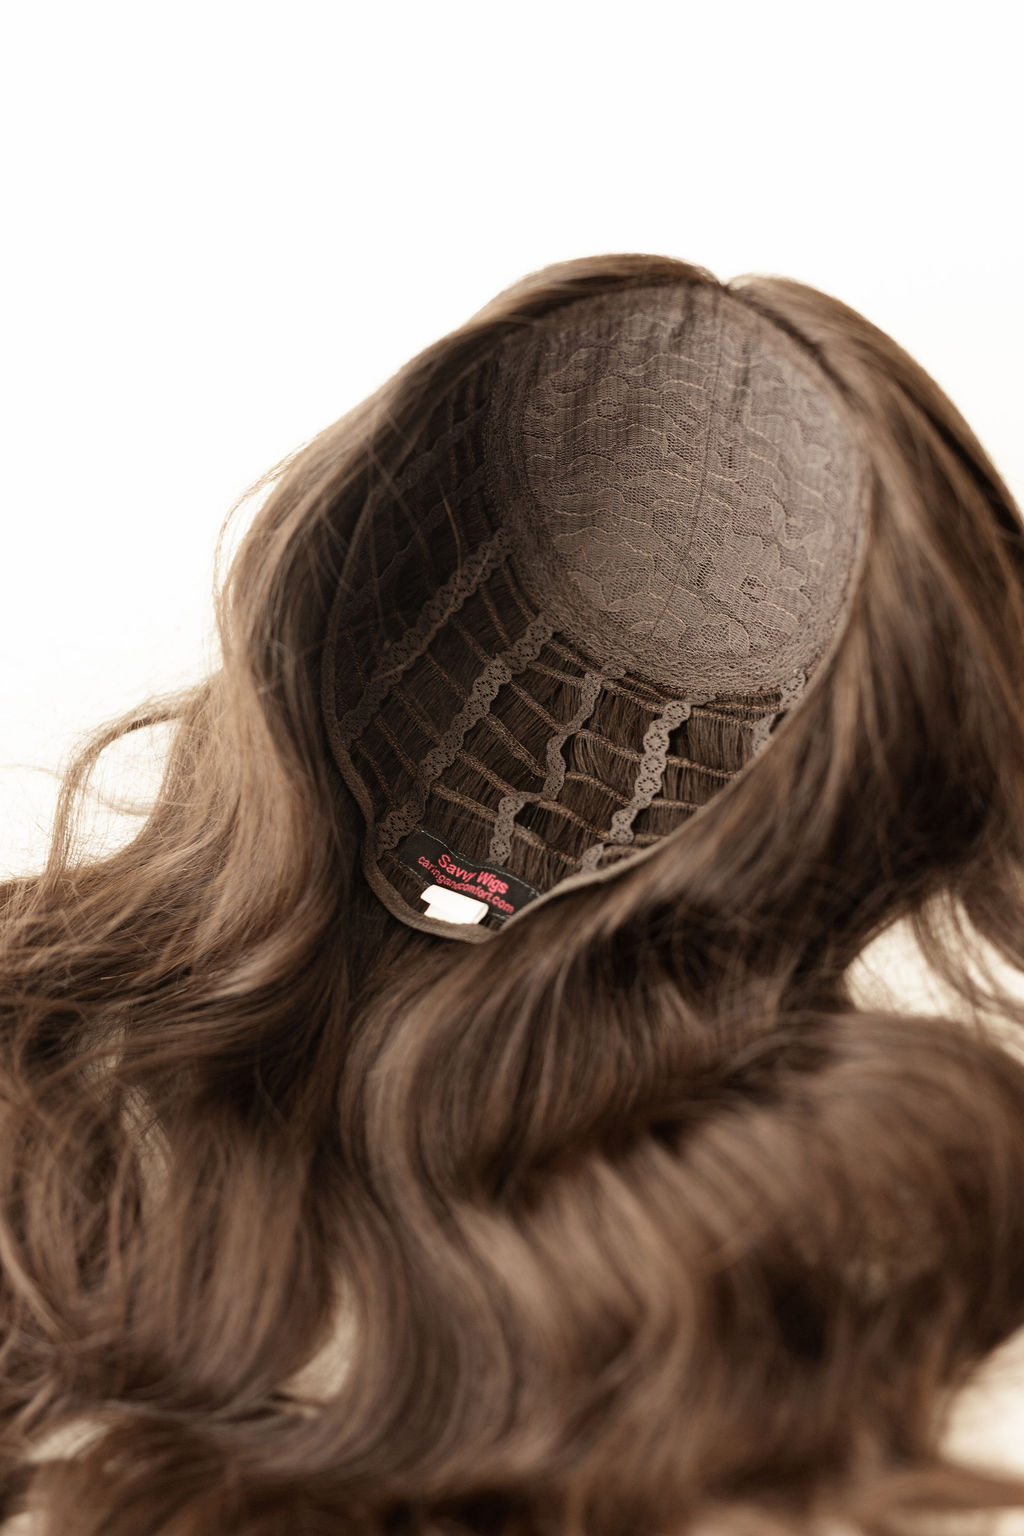
| Skin Top With Wefts | Silk-like top that creates a defined part with durable wefts on perimeter. | Clients who wear bangs. | Most durable construction; stable base. | Heavier; less natural front hairline; less flexible styling. |
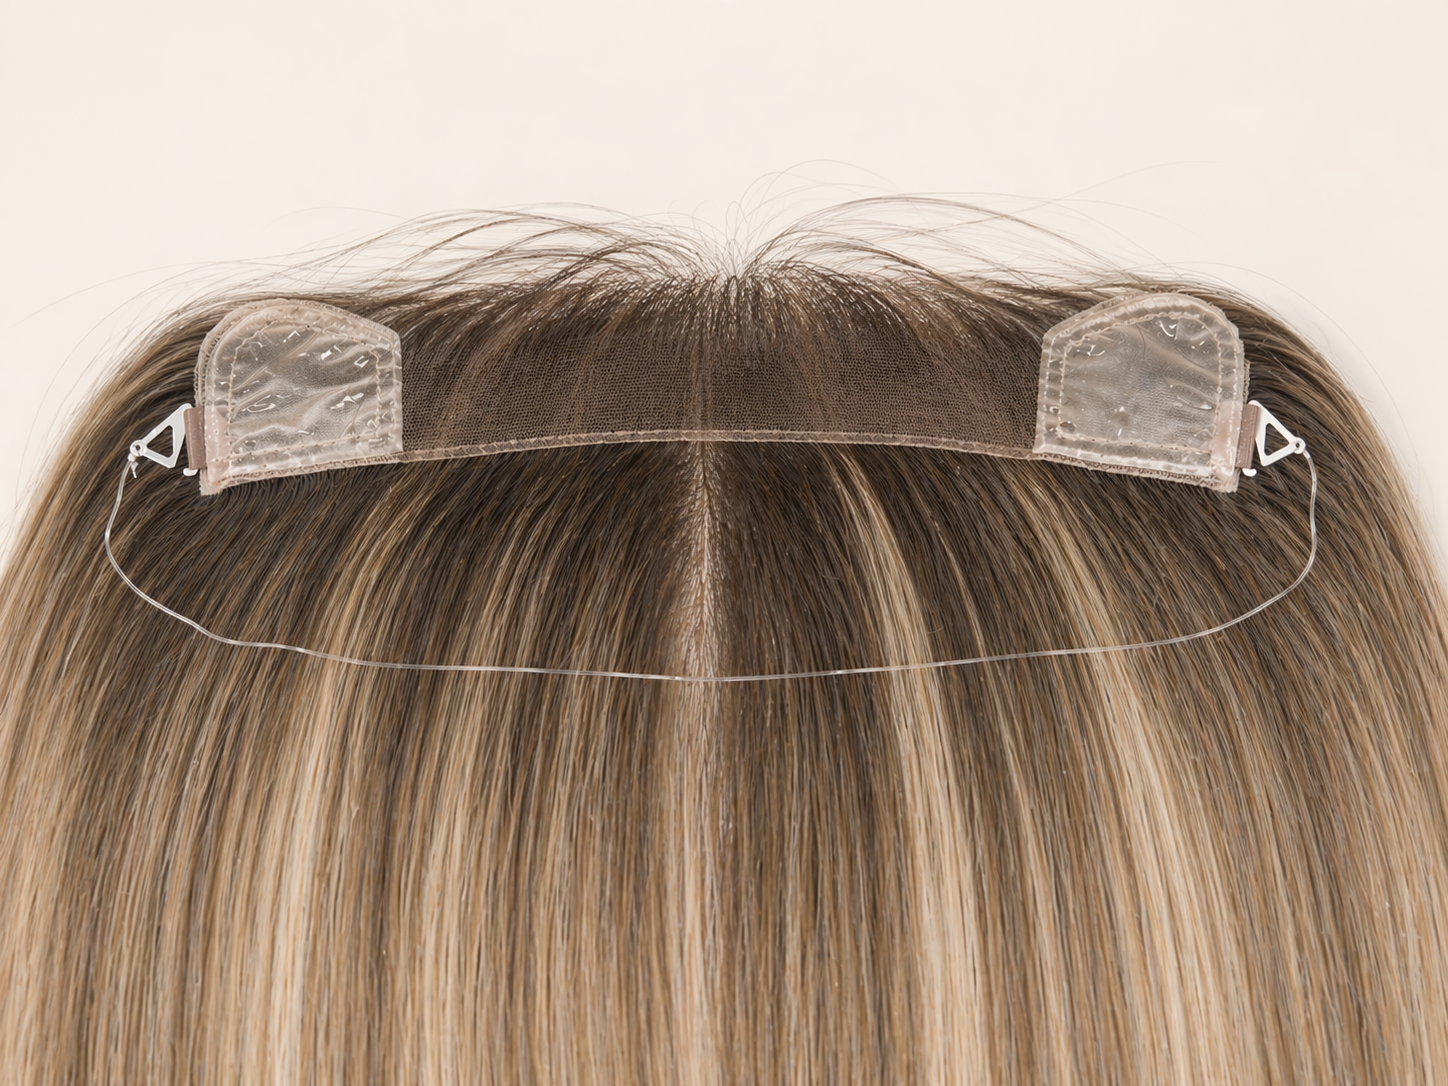
STEP 2 — Measure Your Hair Length
| Step | Instruction | Important Notes |
|---|---|---|
| 1 | Using a soft, flexible measuring tape, place the tape at the top center of your head. | Always start from the crown for accurate length. |
| 2 | Roll the tape down the side of your head, following the natural curve. Stop where you want the topper hair to end. | This number is your topper length. |
| 3 | All topper lengths are offered in 2” increments, and pricing is based on length. | Longer lengths increase the final price. |
| 4 | We do not recommend choosing a topper more than 1” shorter than your natural hair. | Shorter than this will not blend naturally. |
| 5 | We do not recommend choosing a topper longer than your hair unless you plan to wait to wear it. | Length should closely match your current hair for best blending. |
| Tip | If you’re unsure, send us photos of your hair and we will recommend the right length. | Professional guidance ensures the most natural result. |
STEP 3 — Choose Your Part Direction
| Part Direction |
|---|
| Left |
| Deep Left |
| Right |
| Deep Right |
| Center |
STEP 4 — Choose Your Color
Select the color swatch that best matches your natural hair from our color samples. This will give us a starting point for your topper’s overall tone, depth, and warmth.
For the most accurate match, we strongly recommend sending a hair sample. Your natural hair contains multiple tones and undertones that swatches and photos cannot fully capture. A physical sample allows us to blend the topper color strand-by-strand for the most seamless result.
| Root Color Options | Root Length Options |
|---|---|
|
Black Darkest Brown Brown Light Brown |
½", 1", 2", 3", 4", 5", 6" |
We typically recommend adding a lowlight when choosing roots, as this helps create a natural transition from the root into the main color. Lowlights may be selected from the same range of colors for a realistic, dimensional finish.
| Highlight Color Options | Highlight Intensity |
|---|---|
|
Ash Blonde Warm Blonde White Blonde Yellow Blonde |
Light Medium Heavy |
STEP 4B — Prepare Your Hair Sample (Optional but Recommended)
| Step | Instruction |
|---|---|
| 1 | Collect a small sample of your natural hair. This can be a clean lock cut from underneath or hair gathered from your brush. |
| 2 | Include a few different tones if your hair has natural highlights or variation. This helps us blend the topper color accurately. |
| 3 | Place your hair sample into a small labeled bag or envelope. Include your name and order number. |
STEP 5 — Measure Your Coverage Area
| Step | Instruction |
|---|---|
| 1 | Start by identifying where you want the topper to begin. This is typically at the hairline or just behind it. Place a flexible measuring tape at that exact starting point. |
| 2 | Bring the tape straight back over the top of your head to the point where you want the topper to end. This measurement is your front-to-back coverage. |
| 3 | Next, measure side to side. Place the tape above one ear, bring it across the top of your head, and stop above the opposite ear. This gives you your side-to-side measurement. |
| 4 | Choose a topper size that fully covers your thinning area. You want the topper to extend slightly beyond the thinning so it blends naturally into your bio hair. |
| 5 | If you expect more thinning in the future, select a slightly larger size. This ensures your topper continues to blend well over time. |
| 6 | Keep in mind that pricing is based on the size of the topper. Larger bases require more craftsmanship and hair, which affects the cost. |
| 7 | If you’re unsure about your measurements, you can send us photos with the measuring tape positioned, or schedule a consultation for guidance. |
STEP 5B — Create Your Head Mold (Optional but Highly Recommended)
| Step | Instruction |
|---|---|
| 4 | Place Saran Wrap over your head. Wrap the entire top and crown area several times to create a thick, secure plastic layer. This step will require the help of a friend. |
| 5 | Once the plastic is secure, apply clear masking tape generously over the Saran Wrap. Cover all areas where the topper will sit. Make sure no spots are left without tape, and be careful not to get tape on your hair. |
| 6 | If you plan to wear your topper at the front of your hairline, use a permanent marker to carefully trace your hairline onto the taped surface. Do this while the Saran Wrap and tape are still on your head so we can recreate your natural hairline as accurately as possible. |
| 7 | Lightly smooth the tape, but don’t worry about making it perfectly flat. Small bumps are completely fine and help us understand your natural head shape. |
| 8 | With your helper’s assistance, gently remove the mold from your head once fully taped. This taped Saran Wrap mold provides an exact outline of your head’s contour and hairline. |
| 9 | Place your hair sample and mold together in a padded envelope and mail them to us. These materials allow us to create the most precise and natural-looking topper possible. |
The Custom Topper
1761 N Young Circle, Ste. 3 #324
Hollywood, FL 33020
Optional: Create a head mold using Saran Wrap and tape for precise fitting.
STEP 6 — Choose Your Texture
| Texture Type | Description |
|---|---|
| Straight | 
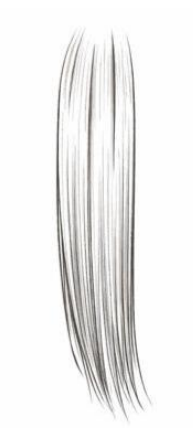
Smooth, sleek, and naturally straight from root to end. |
| Straight With Body | 
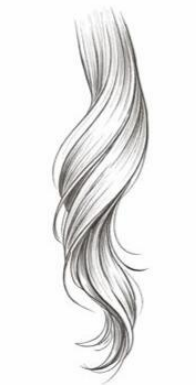
A soft wave with light movement for a blowout-like finish. |
| Curly | 
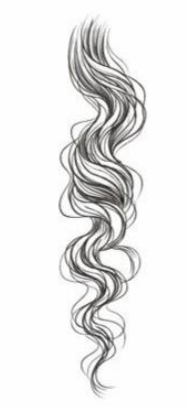
A defined curl pattern that can be matched to your natural curl type. |
| Texture Matching | If you are sending a hair sample or photos, we will match your texture based on your natural pattern. Your sample helps us select the correct wave or curl formation so your topper blends seamlessly with your bio hair. |
STEP 7 — Choose Your Density & Securing Method
| Option | Description |
|---|---|
| Light Density — Recommended | Ideal for fine or curly hair. Creates the softest, most natural blend without puffiness and provides the flattest connection to your bio hair. |
| Medium Density | Best for straight or wavy hair that needs balanced, realistic fullness. Also recommended for clients who flip their part or want multidirectional styling. |
| Full Density | Provides maximum volume and height at the crown. Best for clients with naturally thick straight hair or those who want a fuller, more lifted look. |
| Density Guidance | Density and texture work together to help your topper blend naturally. Curly hair usually looks most realistic in light density, while straight hair can support medium or full density. If you are unsure, we can recommend the right choice based on your photos or hair sample. |
| Clips | Small pressure-sensitive clips sewn around the base. Clips offer the strongest and most secure hold. Placement is adjusted based on your hair density and thinning pattern to prevent pulling or tension. |
| Invisible Wire | A clear adjustable wire that slides through your hair and sits under the nape for clip-free wear. Ideal for sensitive scalps, though it requires more blending with your natural hair. |
| Clips + Invisible Wire | Choose both for maximum flexibility and security. Many clients use clips for daily wear and switch to the wire for more gentle, low-tension days. |
| Need Help Choosing? | If you are unsure which density or securing method is best, we can recommend the right option based on your hair density, thinning pattern, and comfort preferences. |
STEP 8 — Time Frame for Custom Orders
| Category | Details |
|---|---|
| Custom Production Time | Custom toppers are handcrafted from scratch based on your exact measurements, color blend, and construction choices. |
| Standard Time Frame | 8–11 weeks from the time we receive your measurements, hair sample, and head mold (if provided). |
| Rush Order Option | A rush option is available with a 5–6 week turnaround for an additional $300. |
| Why This Time Is Needed | Because each topper is fully custom, this time frame ensures accuracy, craftsmanship quality, and a result perfectly tailored to you. |
| Custom Hairline Design | We can create a custom hairline based on your photos, matching your natural shape, irregularities, baby hairs, and natural growth pattern. |
| Extended Coverage Planning | If you expect additional thinning in the future, we can build extended coverage placements and a larger base for long-term blending and protection. |
| Density Selection | Choose your density level based on your desired look. Light density is recommended for curly or naturally thinner hair, while full density suits clients wanting more volume and height. Density affects overall pricing. |
| Need Guidance? | If you are unsure which craftsmanship options are best, you may send photos or schedule a consultation so we can guide you through all available choices. |